
The Tablo Dual HDMI is arguably the best over-the-air (OTA) digital video recorder (DVR) for most people. With an HDMI output, the Dual HDMI connects to televisions or projectors for a traditional DVR experience. Since the Tablo Dual HDMI supports raw MPEG2 broadcast-quality recordings, it delivers top-notch audiovisual quality. Learn how to set up a Tablo Dual HDMI OTA DVR so you can start recording live, over-the-air television!
What is the Tablo Dual HDMI OTA DVR?

![]()
Tablo’s Dual HDMI OTA DVR is a great DVR for cord-cutters. Whereas the Nuvyyo’s network-connected Tablo DVRs lack a video output, the Dual HDMI sports an HDMI port for connecting to display devices such as TVs or projectors. Able to capture raw MPEG2 video at 1080i, 30 frames per second (FPS) as well as 720p, 60 FPS, the Dual HDMI delivers best-in-class audio and video quality. While the Tablo Dual HDMI sports a dual TV tuner for watching and recording up to two shows simultaneously, its Tablo Quad HDMI older sibling includes a quad TV tuner.
Since the Tablo Dual HDMI relies on an HDMI connection, there’s a front-facing infrared (IR) sensor that interfaces with its included candybar remote. In addition to video out capabilities, the Dual HDMI features limited networking functionality. An Ethernet port along with Wi-Fi provide in-home streaming to select devices such as smart TVs, Android TV boxes, Rokus, and other media players.
Tablo Dual HDMI OTA DVR Specs
- In the box: Tablo Dual HDMI OTA DVR, remote, 2 x AAA batteries, power supply, 5′ Ethernet cable, 5′ HDMI cable, quick start guide
- Connectivity: Barrel jack power port, 1 x USB 3.0, 1 x HDMI 2.1 output, 1 x coaxial input, 1 x Ethernet 1000/100/10
- Dual TV tuner: Watch and record up to two channels simultaneously
- Specs: Quad-core processor, 2GB RAM, 16GB flash storage
- Networking: 802.11ac dual-band Wi-FI with MIMO, Gigabit Ethernet
- Supports USB external hard drives (1TB-8TB recommended)
- Raw MPEG2 video recording compatible
- Stereo PCM audio or AC3 5.1 passthrough
How to Set Up Tablo Dual HDMI OTA DVR
![]() Setting up the Tablo Dual HDMI is fairly simple. In addition to the DVR itself, you’ll need an OTA antenna and a USB storage harddrive. While any sized external USB hard drive will work, I recommend at least a 1TB drive. Because of its raw MPEG2 recording abilities, recordings can be pretty large, so even a 1TB drive will fill up quickly.
Setting up the Tablo Dual HDMI is fairly simple. In addition to the DVR itself, you’ll need an OTA antenna and a USB storage harddrive. While any sized external USB hard drive will work, I recommend at least a 1TB drive. Because of its raw MPEG2 recording abilities, recordings can be pretty large, so even a 1TB drive will fill up quickly.![]()
What you’ll need to set up a Tablo Dual HDMI over-the-air DVR:
- OTA antenna
- USB external hard drive
- Tablo Dual HDMI
Connect an OTA Antenna to Your Tablo Dual HDMI

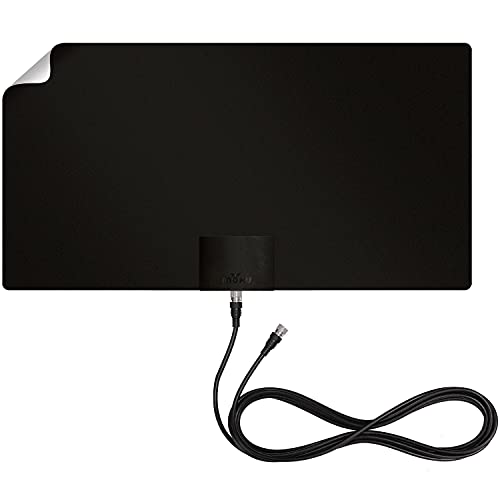
Begin by hooking up an over-the-air antenna to your Tablo Dual HDMI DVR. The Antennas Direct ClearStream 2V or ClearStream 4V are solid outdoor antennas, while the Mohu Leaf Supreme Pro is a good indoor flat antenna. Although outdoor antennas often deliver better reception than indoor antennas, it’s usually easier to set up an indoor antenna. A flat coaxial cable jumper cable allows you to install an outdoor OTA antenna without any tricky cabling or wiring modifications.
On the rear of the Tablo Dual HDMI, you’ll find a coaxial input. Securely attach one end of a coax cable to the Tablo Dual’s antenna input, and the other end of the cable to your antenna or coaxial splitter.
Plug in a USB Harddrive

Next up, hook up your USB hard drive to the USB input on the back of the Tablo Dual HDMI over-the-air DVR.
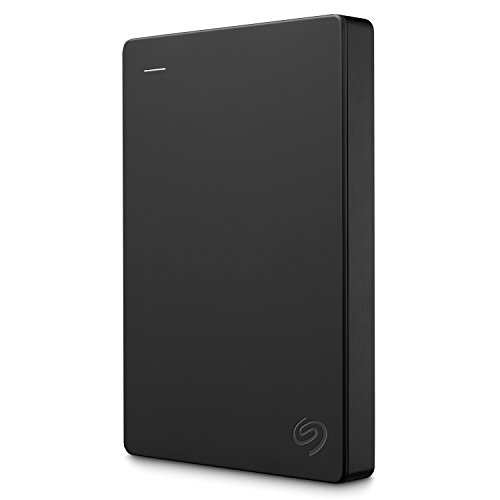
For a hard drive, I’d recommend the Seagate Portable which is available in sizes ranging from 1TB to 5TB. You may also consider the Western Digital Elements USB HDD which comes in capacities of 1TB to 5TB as well. If you need a ton of storage space, the WD Elements 8TB is a great option.
Connect the Tablo Dual HDMI to Your TV or Projector

Now, it’s time to connect your Tablo Dual HDMI to your television or projector. Before that, make sure that you’ve inserted the included AAA batteries into the Tablo’s remote. Run an HDMI cable from the HDMI port on the Tablo Dual to your display device.
Ethernet Connection

Since the Tablo Dual HDMI relies on an Internet connection for in-home streaming as well as channel guide information and software updates, you’ll need to use Wi-Fi or Ethernet. For a hardwired connection, simply plug an Ethernet cable into the LAN jack on the back of the Tablo OTA DVR.
Plug in the Tablo Dual HDMI’s Power Adapter

Finally, with your OTA antenna, USB hard drive, and HDMI cable all properly hooked up, plug in the Tablo Dual HDMI’s power adapter to boot up the DVR.
Follow the on-Screen Prompts in the Tablo Set Up Wizard

Once you’ve properly connected your OTA antenna, USB hard drive, HDMI cable, Ethernet cable, and power adapter, your Tablo Dual over-the-air DVR will power on. Then, the Tablo DVR software setup wizard will walk you through the remainder of the installation process.
Welcome Screen

First up, you’ll see a friendly welcome screen that tells you the various steps in setting up your Tablo Dual HDMI DVR. Select Continue.
Connect to the Network – Ethernet or Wi-Fi

Now, make sure you’re connected to the Internet. Provided that you used an Ethernet cable, you should be ready to go. If you plan to use Wi-Fi, let the Tablo Dual HDMI run a network scan and select your network from the list.

Software Updates

Now that you’re connected to the Internet, the Dual HDMI will download and install any software updates. If there’s an update, just pick Install Update and wait for the update to finish.
Connect a TV Antenna

With your Internet connection established, make sure your OTA TV antenna is connected correctly, then select Continue.
Set Your Location

With your antenna connected, enter your zip code or postal code. This information downloads guide data for the over-the-air channels your antenna can pull in. Enter your zip code, then hit Continue.
The Tablo DVR will then show a confirmation screen with your zip/postal code and time zone. If that looks ok, press Continue.
Add a Hard Drive

Make sure to connect a USB hard drive. With your storage drive connected, the Tablo Dual HDMI will format your drive. At the confirmation screen, select Format Drive which will erase any data on the drive.

Then, simply wait for the drive to finish formatting.

When your storage device is done formatting, you’ll see a screen that says Hard Drive Ready. Press Continue.
Channel Scan

Next up, the Tablo Dual HDMI will perform its initial OTA TV channel scan. When that finishes, you’ll see a Your Channels screen. You can select Continue to finish setting up your Tablo Dual HDMI OTA DVR, or re-position your antenna and rescan to get better reception.

Downloading Channel Guide Data and Enabling Automatic Commercial Skip

When you’re happy with your channel list and have hit continue, Tablo will download channel guide data.

You’ll also be prompted to enable Tablo’s Automatic Commercial Skip functionality. While this is a paid, premium feature, there’s a 30-day free trial available.

Setup Successful

Finally, when guide data is completely downloaded, you’ll see a screen telling you that setup has successfully completed. Select Let’s Go! to start scheduling recordings and watching live TV.
How to Set Up Your Tablo Dual HDMI OTA DVR – Final Thoughts

The Tablo Dual HDMI OTA DVR is a fantastic device for cord-cutters to enjoy free live television programming without paying for cable, satellite, or streaming services. It retains the ability to record, pause, and rewind live TV. Overall, the Tablo Dual HDMI is an excellent choice for cable cutters that delivers incredible visual quality and in-home streaming along with a solid DVR software experience.
Your turn: What shows are you recording?
Recent Comments